Saturday, August 18, 2012

Enjoying Shrimp and Tortellini with Vodka Sauce

What a beautiful evening.    
The weather - delightful.

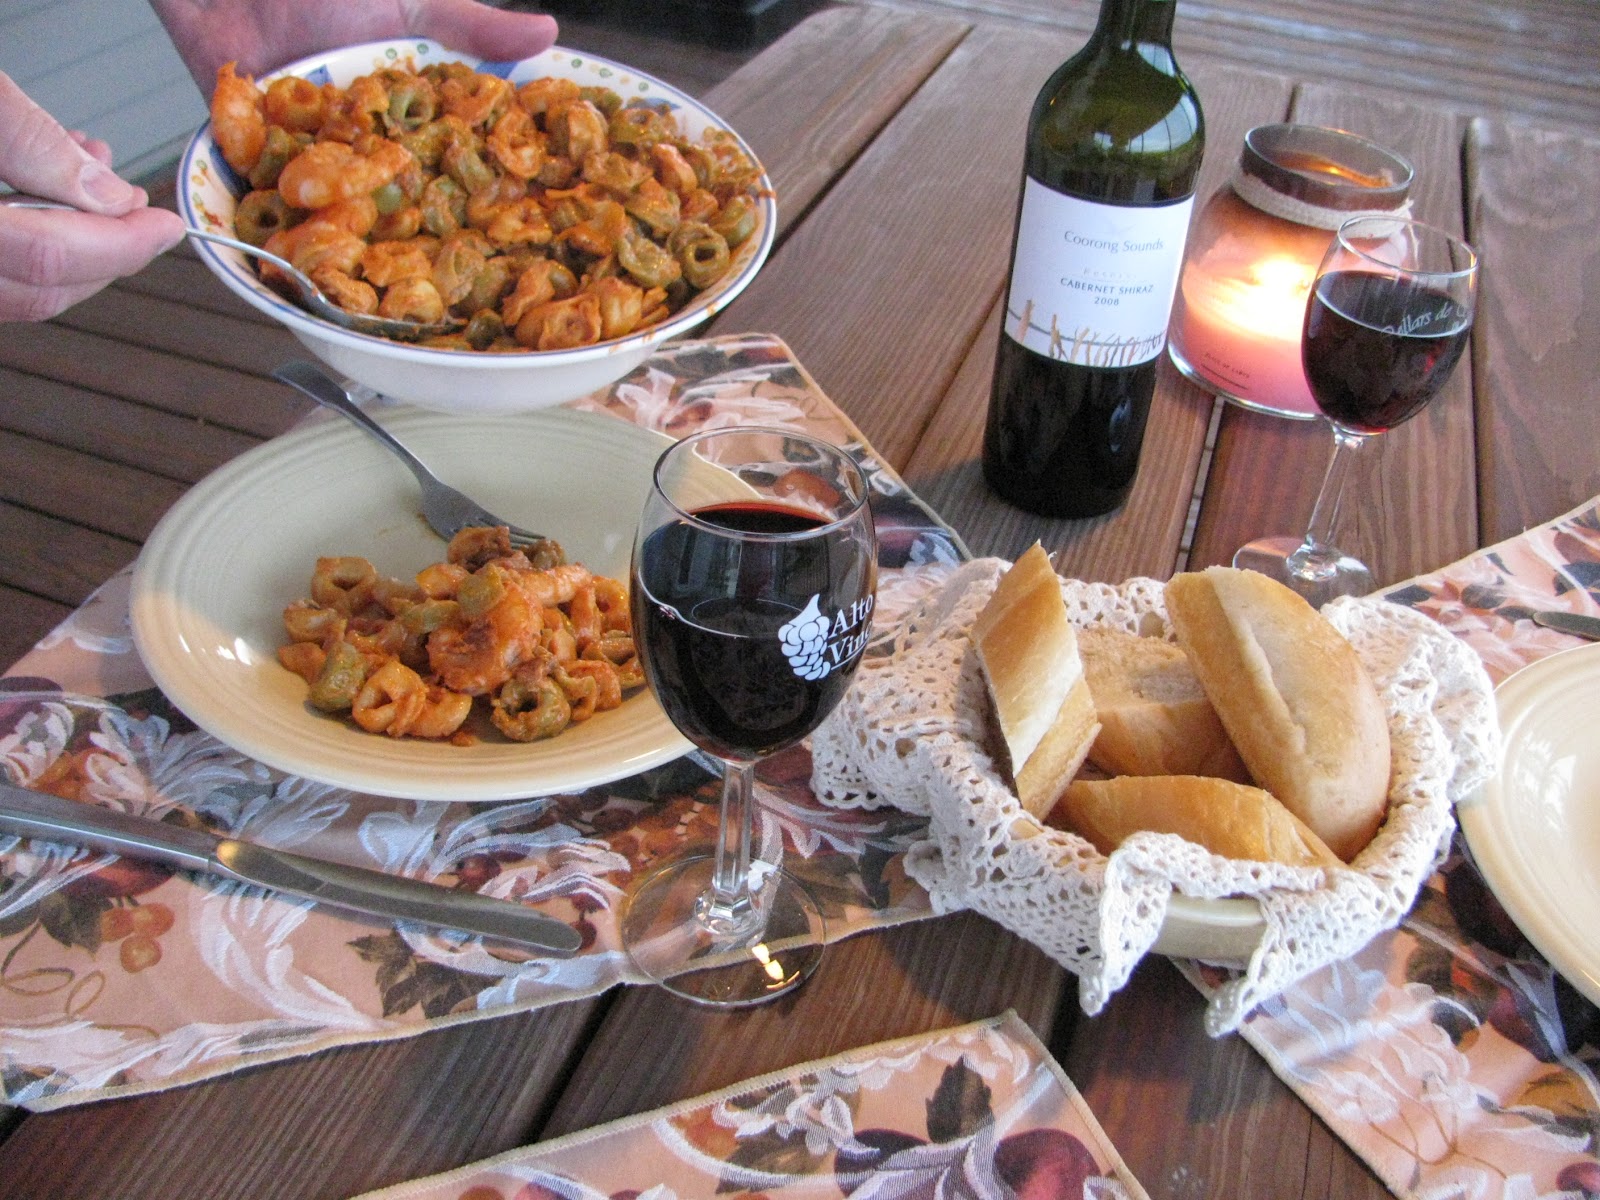
The food - delicious.

The wine - a cabernet/shiraz combo from Australia.

Lately it seems we've turned Saturday nights 'out' into Saturday nights 'in.'  Last week was a great example of that, a fun evening with friends and delicious food, bumped up a notch with the opportunity to sit and visit for hours.  Tonight, I took some nice big shrimp and a pasta idea and turned it into dining al fresco - with candles and wine - I'm sayin', there's no restaurant in this part of SoIL that compares.

This recipe for Shrimp and Tortellini with Vodka Sauce was the main course...

The best part of this recipe is probably the 1/2 lb. of bacon, sliced into 1" pieces and fried until crispy in a large skillet.  Remove bacon to paper towels to drain.  Then - I am serious about this - fold the paper towel over it and put it somewhere you can't see it.  Unless you are the kind of person who doesn't snitch fresh, crispy bacon while it's waiting around for its next instruction.  I am not that person.

Now, back to the bacon drippings.  I could switch to butter here, but - there really wasn't any point in it!  Leave about 2T of the bacon drippings in the skillet, and pour the rest into a 3 - 4 qt. saucepan.  Add water to the saucepan for boiling the tortellini; bring the water to a boil.

I started with 14 oz. parmesan tortellini - I mixed the regular and spinach varieties.  Boil the tortellini for approximately 15 minutes.


While the tortellini was boiling, I stepped outside to snip some fresh basil.  This is a photo of the actual piece I clipped for the recipe - hasn't it recovered nicely from near-death in the heat of recent weeks?


Vodka sauce isn't hard to make.  I've never tried it before - and was very happy with the results.  Simply combine 1/3 cup vodka with the pan drippings (or 2 Tablespoons butter if you want to make it for another recipe).  Stir until reduced by about half, about 4 - 5 minutes.  

Add 1 15 oz. can tomato sauce and 1/2 cup whipping cream (ohhh I don't remember saying anything about this being lo-cal...) and simmer uncovered for about 10 - 15 minutes.  My dad was a dairy farmer, and he sold milk to Prairie Farms - I remember that big tank truck pulling into the lane, and the fresh, super-cold 'raw' milk.  I tend to grab the Prairie Farms milk products when they are available, just for memory's sake.

Add basil and thyme to taste (I had a little bit of thyme that had finally grown - from seed - large enough to use.  This year's herb experiment has been a treat!) and a generous sprinkle of freshly ground black pepper.


So - the tortellini's boiling, the sauce is simmering, and you have a couple of minutes to peel about 1 lb. of nice big shrimp - of course, you can use whichever shrimp you like for this recipe.  I like the large ones from the seafood truck that shows up in Carbondale a couple of weekends a month.  Expensive?  Yes.  But worth it.  This is a meal that equals a night out - it's still a bargain compared to restaurant fare!


When the tortellini is done, toss it (strained) into the sauce - and use the boiling and bacon-y water for the shrimp.  Shrimp take only a few (less than 5, even for large ones) minutes to cook.  When they come to the top of the water, all pink-and-white, they're done.  Be careful not to over-boil, they tend to get tough if you do.  Toss the shrimp into the skillet with the sauce and tortellini, sprinkle with a generous helping of grated parmesan cheese to your liking, and you're done!

I thought some fresh Italian bread seemed like just the right addition to this meal. Broccoli would add just the right touch of green.  We don't always follow the 'have a vegetable rule.  Oops.


Time to eat!


And toast to the beautiful evening.


Enjoy - God's gift of beautiful evenings - great food - and life.


Sunday, August 12, 2012

Hummingbirds, roses, and lemon cake!

We two "hungry travelers" took the road last night to visit my co-grandma Phyllis (not getting that?  Ask our mutual grandsons Blane and Miller!) and Ron at their home near Red Bud, Illinois.  It was a gorgeous - and COOL - evening, and their country home is a great place to sit outside and enjoy the hummingbirds, the flowers, the delicious smell of pork steaks slow-grilling, and a fun night of conversation!  


Phyllis has a knack for growing beautiful flowers...like this John F. Kennedy hybrid tea rose, a star among her many roses... 
and several saucer-size hibiscus.

The secrets of their garden shed...I'm not sure what they are but the shed itself is as pretty as a flower!


Besides Ron's tender, thick and delicious pork steaks, we enjoyed potato salad and a wonderfully fresh tomato salad.  Phyllis shared the simple recipe secret...these fresh, beautiful, and tiny tomatoes, also from the back yard, cut in half with sliced red onions and marinated in Newman's Own Low-Fat Balsamic Vinaigrette - that's IT!  I was intrigued by this tiny tomato on the vine before I even tasted the perfect-for-summer dish!  A little research tells me it's a 'pear tomato,' one of the oldest heirloom cherry-size tomatoes. 

Topping off the meal was Phyllis's also-perfect-for-summer cake, and I was thrilled; my mom used to make this cake.  I haven't had it in years!  It's a perfect solution when you need a no-fuss dessert.

Lemon Jello Cake

Dissolve 1 small box lemon jello in 1 cup hot water, and cool the mixture.  Combine 1 lemon cake mix, 3/4 cup cooking oil, 4 eggs, and 1 1/2 Tablespoon lemon juice - that's about 2 large or 3 small lemons - in a mixer bowl, and beat for about 1 1/2 minutes.  Fold in the cooled lemon jello, then bake in a greased and floured 9x13 pan - 350 degrees for 35 to 40 minutes.

Now - QUICK - while the cake is still hot, prick it many times with a fork, and spread with a thin icing  mixture of 1 cup powdered sugar blended with 4 Tablespoons lemon juice.

It's fresh and delicious, and no surprise that it disappeared in a flash! (Note that the corner is cropped from this photo so you can't see how big my piece was...)


To think we almost went to a restaurant - this was SO much better.  Thanks, Phyllis and Ron, for being (and preparing) this week's blog subjects - it was a delightful and delicious evening!


Now...just give us a call and we'll be happy to come over and blog a meal at YOUR house....(*wink*)

Sunday, August 5, 2012

That's Just Peachy Part 2: Very Favorite!


  • A visit to old friends down South helped me to remember one of the easiest and best peach desserts.  Don't worry about peach season - this one is almost as good made with canned peaches.  Yes, really!

And I'm not sure if it has a name.  I've seen something like this called a cobbler, but it's not quite a cobbler...and it's not quite a crisp...and I've heard of a 'buckle' but I don't even know what that is.  If there's a real name for this scrumptious peach dessert, please let me know...in fact, let's have a naming contest!

For now, let's call it: T's Very Favorite Peach Dessert. Because it is.  Actually it ranks in his top 3 all-time favorites - along with iced sugar cookies and Italian Cream Cake!

Preheat the oven to 350 degrees.  

Pour 1 (29 oz.) can of sliced peaches WITH juice into a buttered 9 x 13 baking pan.  Make sure the juices cover the peaches.  OR, slice and peel enough peaches (6-8) to make a solid layer in the bottom of the pan, and toss with 1/2 cup of sugar.  (If you use fresh peaches, you might want to give it some time at this point, so that the sugar starts to draw the juices out of the peaches.) Photos show 1/2 recipe, and for the sake of experimenting, these peaches weren't peeled; don't leave the skins on unless you particularly like them that way.  
But they sure do look pretty, don't they?


In a small bowl, cut with a pastry cutter 1/2 cup cold butter or margarine into 1 (18.25 ounce) dry white, butter pecan, or yellow cake mix (just the mix, don't follow the box directions), 1/2 cup white or brown sugar (the brown will provide a little more textured topping), and 1 teaspoon cinnamon.  If you're not sure what a pastry cutter is, go to www.pastrycutter.net.  I was amazed to see a web address dedicated to pastry cutters...


  • Sprinkle this mixture over the peaches.  Poke some holes in the topping to be sure the juiciness can get through. That's all there is to it!


Bake at 350 for approximately 40 minutes, until the juices are bubbly and the topping is crusty and golden brown.  Check it in about 20 minutes - and note that with fresh peaches, you might need to give it a gentle stir at this point to pull some juiciness to the top. You'll know you need to do that if it's looking a little too flour-y on top.  

  • I hope you have the ice cream ready.  I've never seen a dessert that begs for ice cream more than this one...  


Thursday, August 2, 2012

That's just peachy! Part I, Peach Crepes.

Peach fuzz.
Peachy.
You're a peach.
Peachy-keen.
Peaches-and-cream...

Peaches make good conversation.  They make even better desserts - and here is an EASY favorite!  It's peach season and I can't get enough of them; I've been eating them twice a day.  This year, hand-delivered South Carolina peaches won my personal choice award for juicy goodness! 

This recipe is flexible and fun:  Peach Crepes.  Kids like 'em.  Adults like 'em.  What's not to like - sweetened peaches and whipped cream in a feather-light wrapper! 

Start by lightly sugaring a few cut-up peaches in a bowl.  And blueberries.  Or strawberries.  And/or any fruit that will taste good wrapped up with some whipped cream...

Oh - hold on before your imagination gets carried away. We're concentrating on peaches here...

Beat 1 cup of heavy whipping cream (Yes - make it "real"!  You will be so glad you did.) until it starts to thicken; then add 3 Tablespoons powdered sugar and 1/2 teaspoon vanilla extract.  Continue to beat until soft peaks form, and chill until ready to use.  

Next, make crepe batter:  In a bowl that's good for pouring (a quart-size measuring bowl with a spout works well), combine 4 lightly beaten eggs, 1 1/3 cups milk, 2 Tablespoons melted butter, 1 cup all-purpose flour, 2 Tablespoons white sugar, and 1/2 teaspoon salt.  Whisk together until smooth.

Heat a medium-size skillet - or better yet, a crepe pan (a skillet with very gently sloping sides) - which you have greased with a small amount of butter or oil.  Gently swirl a thin layer of batter onto the skillet.   If you have an electric crepe maker, follow directions...I don't know if they make those upside-down mini-skillet things any more.  Leave a note if you have one without instructions and I'll try to walk you through it - or better yet, we'll ask Jodi from peachy SC to send us a video demo!  A griddle, with its big flat non-restrictive surface, is not the best choice - just trust me on that.  We ended up with the shapes of several U.S. states.  This is a VERY thin batter - it's supposed to be, it's the thinnest pancake ever.  And just like a pancake, it will start to bubble just a bit on top; flip it, let it brown gently on both sides (just a minute or two per side), and you are ready to put this dessert on a plate!

Pile on the peaches - or assortment of other fruits of your choice.  Dollop a generous helping of the whipped cream and gently curl the crepe around to make a delicious, fun, and easy treat.  Your family/guests can make their own, just keep the warm and delicious crepes coming to the table.

I can't stop there!  Watch for Part II, more peach sweetness, coming soon....