Wednesday, December 26, 2012

Holiday Food: It was a very good year...

The holidays...what a happy roller-coaster of tastes.

Fantasy food comes to life in the form of sugary treats.

Savory layers of depth appear in tender, herbed meats.

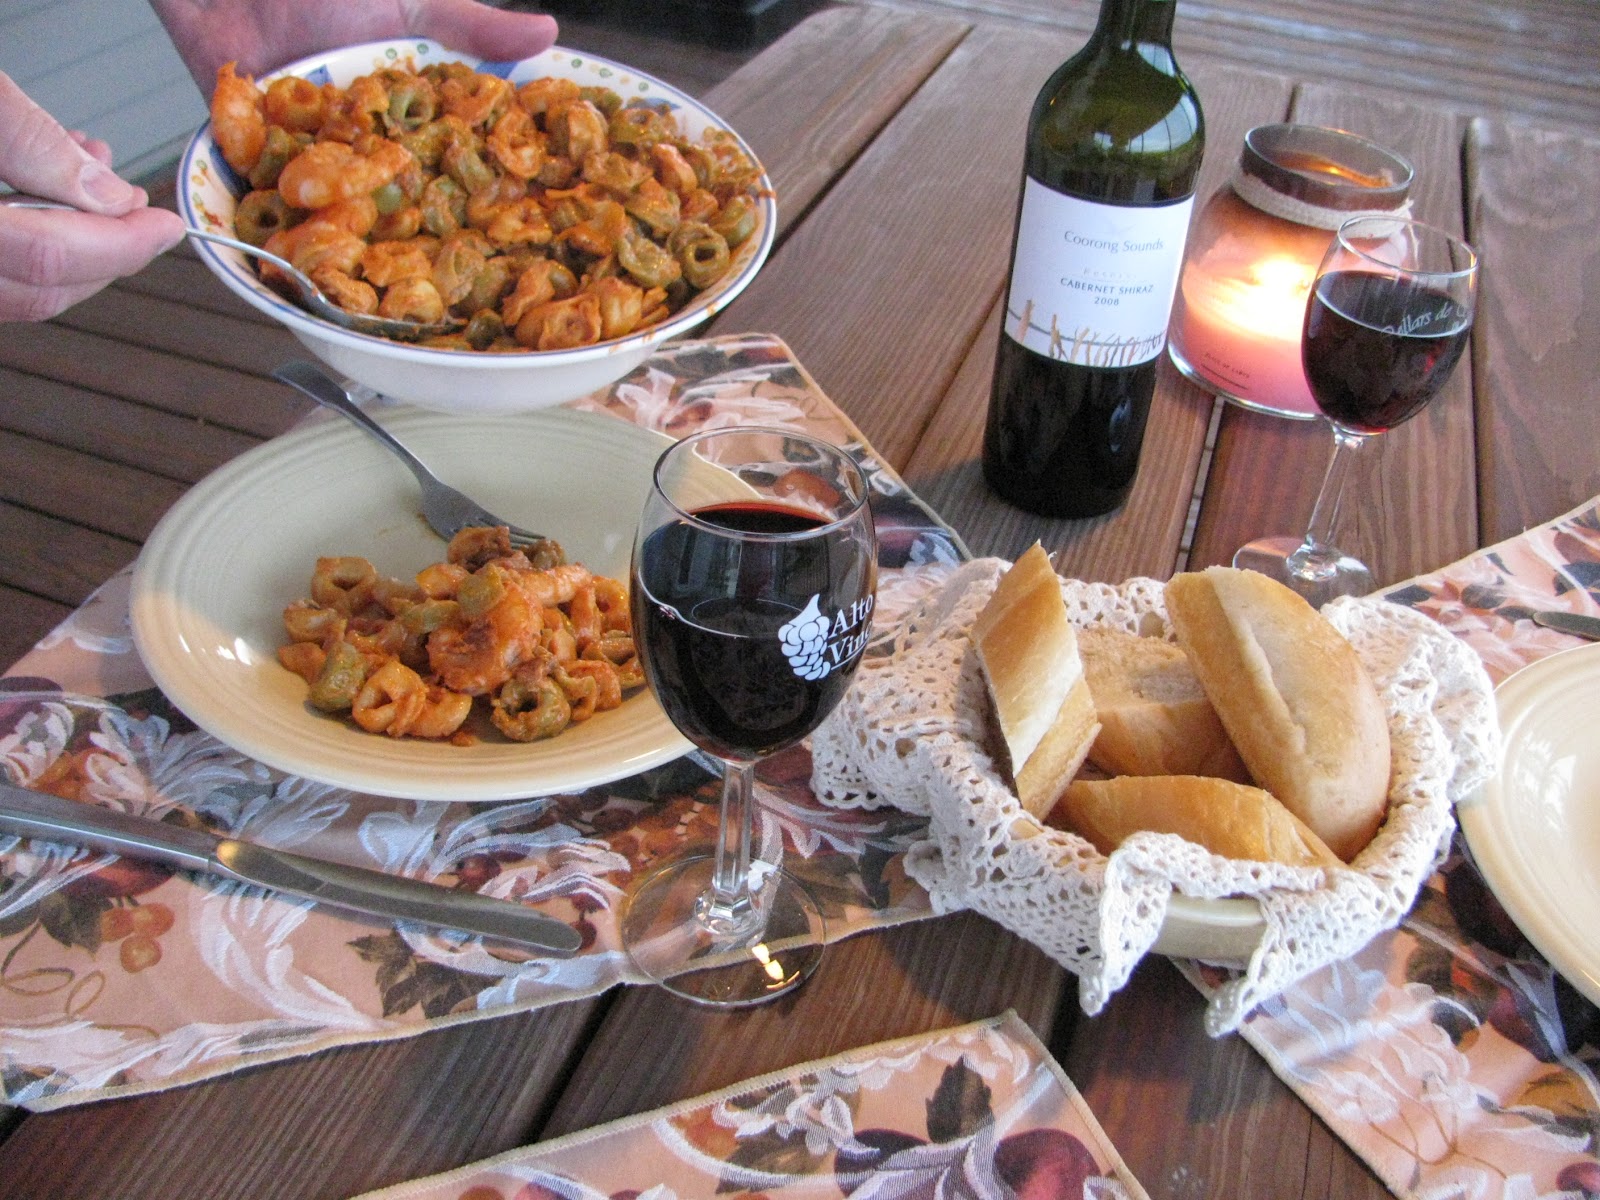
Consider the impact of so many bloggers and magazines and of course - food shows on t.v.!  I was so busy reading food memoirs and seeking the best ideas of the season, I didn't take the time to fill you in on 2 Hungry Travelers' favorite seasonal dishes.   Instead - I did a lot of recipe-seeking and came up with some winners!

So it's all over but the digesting, so to speak.  How about a wrap-up of some of the yummiest of the season, so we can come back here next year when it's time for pre-holiday planning?

A fried turkey was our centerpiece, so to speak.  The frying job is hard work and needs close attention...or so I'm told. It involves lawn chairs and beer. I brined it the night before with Emeril's turkey brine - I'd never done that before - it made the turkey so flavorful and extra-juicy!  Travis injected it with Italian dressing just before frying.  We used a fresh turkey from the local Amish store - I can't imagine a better Thanksgiving (or any holiday) centerpiece!


This new dressing received rave reviews!  Check it out at Pioneer Woman's website: Cornbread Dressing with Sausage and Apples.   It's traditional dressing kicked up with sausage, apples, and delicious sautéed baby portabello mushrooms.  I'm never making 'the old kind' again; this is one you'll make more often than the holidays because you'll be missing it if you don't.
This photo was taken before baking.

See the link to Pioneer Woman's recipe for the post-baking transformation.  

Everybody makes green bean casserole at holidays.  I settled in with a few good food magazines and tried to find something a little different.  As delicious as Green Bean Lasagna from Southern Living magazine was, I'm willing to bet that everybody's favorite traditional onion-ring-topped green bean casserole might be back on our table next year.  Green Bean Lasagna will instead become a favored side for steak night - it was stand-alone delicious, no need to compete with all those other dishes!  But do take advantage of its updated onion ring topping on your traditional casserole:  toss together 1 1/2 cups crushed Ritz-like crackers, one 6 oz container french fried onions, and 3 T melted butter instead of 'just onion rings.'  The buttery goodness was a step above average!  Check out the link for a photo that will make your mouth water.

Another holiday favorite - rolls! - we can't have a family dinner without the dinner rolls.  Again, thanks to Ree Drummond - The Pioneer Woman.  Her No-Knead Dinner Rolls went over well and included quite a surprise: yeast rolls with baking soda and baking powder thrown in at the end?  What?  All I can say is - the combo worked very well and produced some wonderfully light and a little bit lumpy, let's call that "rustic," rolls.  Diverting from PW's direction, mine were made using one ball of dough per muffin cup, not three.  The dough is very sticky and it just made sense!  Try mixing 1 lb. soft butter with 1 cup finely chopped cranberries and 1/2 cup honey for the yummiest Cranberry Butter - make 1/2 of that amount if you don't want a lot; we're still happily and intentionally spreading it on everything breadlike.

In case anyone "needed" a few more bites,  I made tiny pumpkin pies in mini-muffin tins that the grandsons especially loved, and our family favorite Italian Cream Cake, and shortbread...

I'm not sure why we wait for holidays - our families love this traditional, and sometimes not-so-traditional, food.  As we welcome 2013, we're thankful for the blessing of family, joyful that Christmas is special to those we love.  We look forward to a year of more recipe tweaking and sharing with the family - and with you. We'll try to work in some hungry-traveling adventures, too!  May your new year be a peaceful one - full of great food.

Thursday, September 27, 2012

Fall Magic Bars!

I've been thinking lately that I'd wait to post here until something really inspires me. I guess life has been a little busy, or just not food-fascinating.  I did make Barefoot Contessa's Cheddar Corn Chowder last week, ohhh YUM, do try it...it's delicious!  But not mine.

I like to post what I've made 'my own' in some way.

I'm a happy Pinterest user (Ann_h) and a couple of times recently I've seen a cookie bar combo that was just made for tweaking.  It's kind of like Magic Cookie Bars...or Hello Dollys...or whatever you call them in your neck of the woods.

BUT I wanted to make them better.  Better for fall, better because of candy, better for caramel and saltiness and I just kept thinking of things to add....

So here's my version.  Very fall-ish and made just in time for a chili party at work tomorrow.

Let's call 'em Fall Magic Bars.  If you think of a better name...please let me know...


Start with 1 stick of butter, in a glass or ceramic 9x13 dish.  I used my favorite old oval corningware because the next step is to microwave-melt it.  You can, of course, use a metal pan but if so, please melt the butter another way.

Microwave the butter - 1 minute should do it.  Sprinkle the evenly layer of butter with 1 1/2 cups graham cracker crumbs.  Buying them already crushed is easy, but it's almost as easy (and a lot more fun) to throw a few in a ziploc bag and beat them with a rolling pin.

Pour 1/2 of 1 can of Eagle Brand Milk over this layer.  It doesn't have to be perfect - if you pour in skinny little lines you can make it it fairly even.

This is where the recipe diverges from the traditional.  The next layer is pretzels - break them up a bit and use enough (at least 1 cup - I really don't know, I just kept pulling them out of the bag) to cover the graham cracker layer.  Leave them chunky, but not whole.


Now the (even more) fun begins.  Sprinkle with 1 cup milk chocolate or dark chocolate chips.


AND - my new favorite thing: Caramel Bits.

They are little pea-size caramels that melt like a dream - no more unwrapping caramels or using too-thin caramel sauce!  Use about 1 cup of Caramel Bits. And eat a few.

If you like coconut, now's the time for a coconut layer, 1 cup.

And pour on the other 1/2 of the can of Eagle Brand Milk.

Sprinkle lightly with a few more broken pretzels for crunch, and 1 cup fall-color M&Ms!  It's so pretty, it looks like a pile of leaves in candy form.  M&Ms go on after the Eagle Brand Milk because they will lose their color if you don't.


Some chopped pecans are really nice to sprinkle on at the end, too.  Or anywhere in the middle.  I know this because I made a second batch, which is already partly gone.

Now, very gently, press down all over the top.  Don't crush the M&Ms, you just want it all to associate with the EBMilk layers so that it will hold together.

And bake at 350 for 25 minutes. Let cool before cutting...if you can wait.  T cannot wait, he refuses to wait more than 1 minute after anything sweet leaves the oven.  He had his big glass of cold milk in one hand as I opened the oven door this time.

Of course, this is another of those recipes that YOU can easily make your own, too.  Have fun with it!

I think I need to get some candy corn for next time.  Or maybe some of those teeny Reese's cups...


Saturday, August 18, 2012

Enjoying Shrimp and Tortellini with Vodka Sauce

What a beautiful evening.    
The weather - delightful.

The food - delicious.

The wine - a cabernet/shiraz combo from Australia.

Lately it seems we've turned Saturday nights 'out' into Saturday nights 'in.'  Last week was a great example of that, a fun evening with friends and delicious food, bumped up a notch with the opportunity to sit and visit for hours.  Tonight, I took some nice big shrimp and a pasta idea and turned it into dining al fresco - with candles and wine - I'm sayin', there's no restaurant in this part of SoIL that compares.

This recipe for Shrimp and Tortellini with Vodka Sauce was the main course...

The best part of this recipe is probably the 1/2 lb. of bacon, sliced into 1" pieces and fried until crispy in a large skillet.  Remove bacon to paper towels to drain.  Then - I am serious about this - fold the paper towel over it and put it somewhere you can't see it.  Unless you are the kind of person who doesn't snitch fresh, crispy bacon while it's waiting around for its next instruction.  I am not that person.

Now, back to the bacon drippings.  I could switch to butter here, but - there really wasn't any point in it!  Leave about 2T of the bacon drippings in the skillet, and pour the rest into a 3 - 4 qt. saucepan.  Add water to the saucepan for boiling the tortellini; bring the water to a boil.

I started with 14 oz. parmesan tortellini - I mixed the regular and spinach varieties.  Boil the tortellini for approximately 15 minutes.


While the tortellini was boiling, I stepped outside to snip some fresh basil.  This is a photo of the actual piece I clipped for the recipe - hasn't it recovered nicely from near-death in the heat of recent weeks?


Vodka sauce isn't hard to make.  I've never tried it before - and was very happy with the results.  Simply combine 1/3 cup vodka with the pan drippings (or 2 Tablespoons butter if you want to make it for another recipe).  Stir until reduced by about half, about 4 - 5 minutes.  

Add 1 15 oz. can tomato sauce and 1/2 cup whipping cream (ohhh I don't remember saying anything about this being lo-cal...) and simmer uncovered for about 10 - 15 minutes.  My dad was a dairy farmer, and he sold milk to Prairie Farms - I remember that big tank truck pulling into the lane, and the fresh, super-cold 'raw' milk.  I tend to grab the Prairie Farms milk products when they are available, just for memory's sake.

Add basil and thyme to taste (I had a little bit of thyme that had finally grown - from seed - large enough to use.  This year's herb experiment has been a treat!) and a generous sprinkle of freshly ground black pepper.


So - the tortellini's boiling, the sauce is simmering, and you have a couple of minutes to peel about 1 lb. of nice big shrimp - of course, you can use whichever shrimp you like for this recipe.  I like the large ones from the seafood truck that shows up in Carbondale a couple of weekends a month.  Expensive?  Yes.  But worth it.  This is a meal that equals a night out - it's still a bargain compared to restaurant fare!


When the tortellini is done, toss it (strained) into the sauce - and use the boiling and bacon-y water for the shrimp.  Shrimp take only a few (less than 5, even for large ones) minutes to cook.  When they come to the top of the water, all pink-and-white, they're done.  Be careful not to over-boil, they tend to get tough if you do.  Toss the shrimp into the skillet with the sauce and tortellini, sprinkle with a generous helping of grated parmesan cheese to your liking, and you're done!

I thought some fresh Italian bread seemed like just the right addition to this meal. Broccoli would add just the right touch of green.  We don't always follow the 'have a vegetable rule.  Oops.


Time to eat!


And toast to the beautiful evening.


Enjoy - God's gift of beautiful evenings - great food - and life.


Sunday, August 12, 2012

Hummingbirds, roses, and lemon cake!

We two "hungry travelers" took the road last night to visit my co-grandma Phyllis (not getting that?  Ask our mutual grandsons Blane and Miller!) and Ron at their home near Red Bud, Illinois.  It was a gorgeous - and COOL - evening, and their country home is a great place to sit outside and enjoy the hummingbirds, the flowers, the delicious smell of pork steaks slow-grilling, and a fun night of conversation!  


Phyllis has a knack for growing beautiful flowers...like this John F. Kennedy hybrid tea rose, a star among her many roses... 
and several saucer-size hibiscus.

The secrets of their garden shed...I'm not sure what they are but the shed itself is as pretty as a flower!


Besides Ron's tender, thick and delicious pork steaks, we enjoyed potato salad and a wonderfully fresh tomato salad.  Phyllis shared the simple recipe secret...these fresh, beautiful, and tiny tomatoes, also from the back yard, cut in half with sliced red onions and marinated in Newman's Own Low-Fat Balsamic Vinaigrette - that's IT!  I was intrigued by this tiny tomato on the vine before I even tasted the perfect-for-summer dish!  A little research tells me it's a 'pear tomato,' one of the oldest heirloom cherry-size tomatoes. 

Topping off the meal was Phyllis's also-perfect-for-summer cake, and I was thrilled; my mom used to make this cake.  I haven't had it in years!  It's a perfect solution when you need a no-fuss dessert.

Lemon Jello Cake

Dissolve 1 small box lemon jello in 1 cup hot water, and cool the mixture.  Combine 1 lemon cake mix, 3/4 cup cooking oil, 4 eggs, and 1 1/2 Tablespoon lemon juice - that's about 2 large or 3 small lemons - in a mixer bowl, and beat for about 1 1/2 minutes.  Fold in the cooled lemon jello, then bake in a greased and floured 9x13 pan - 350 degrees for 35 to 40 minutes.

Now - QUICK - while the cake is still hot, prick it many times with a fork, and spread with a thin icing  mixture of 1 cup powdered sugar blended with 4 Tablespoons lemon juice.

It's fresh and delicious, and no surprise that it disappeared in a flash! (Note that the corner is cropped from this photo so you can't see how big my piece was...)


To think we almost went to a restaurant - this was SO much better.  Thanks, Phyllis and Ron, for being (and preparing) this week's blog subjects - it was a delightful and delicious evening!


Now...just give us a call and we'll be happy to come over and blog a meal at YOUR house....(*wink*)

Sunday, August 5, 2012

That's Just Peachy Part 2: Very Favorite!


  • A visit to old friends down South helped me to remember one of the easiest and best peach desserts.  Don't worry about peach season - this one is almost as good made with canned peaches.  Yes, really!

And I'm not sure if it has a name.  I've seen something like this called a cobbler, but it's not quite a cobbler...and it's not quite a crisp...and I've heard of a 'buckle' but I don't even know what that is.  If there's a real name for this scrumptious peach dessert, please let me know...in fact, let's have a naming contest!

For now, let's call it: T's Very Favorite Peach Dessert. Because it is.  Actually it ranks in his top 3 all-time favorites - along with iced sugar cookies and Italian Cream Cake!

Preheat the oven to 350 degrees.  

Pour 1 (29 oz.) can of sliced peaches WITH juice into a buttered 9 x 13 baking pan.  Make sure the juices cover the peaches.  OR, slice and peel enough peaches (6-8) to make a solid layer in the bottom of the pan, and toss with 1/2 cup of sugar.  (If you use fresh peaches, you might want to give it some time at this point, so that the sugar starts to draw the juices out of the peaches.) Photos show 1/2 recipe, and for the sake of experimenting, these peaches weren't peeled; don't leave the skins on unless you particularly like them that way.  
But they sure do look pretty, don't they?


In a small bowl, cut with a pastry cutter 1/2 cup cold butter or margarine into 1 (18.25 ounce) dry white, butter pecan, or yellow cake mix (just the mix, don't follow the box directions), 1/2 cup white or brown sugar (the brown will provide a little more textured topping), and 1 teaspoon cinnamon.  If you're not sure what a pastry cutter is, go to www.pastrycutter.net.  I was amazed to see a web address dedicated to pastry cutters...


  • Sprinkle this mixture over the peaches.  Poke some holes in the topping to be sure the juiciness can get through. That's all there is to it!


Bake at 350 for approximately 40 minutes, until the juices are bubbly and the topping is crusty and golden brown.  Check it in about 20 minutes - and note that with fresh peaches, you might need to give it a gentle stir at this point to pull some juiciness to the top. You'll know you need to do that if it's looking a little too flour-y on top.  

  • I hope you have the ice cream ready.  I've never seen a dessert that begs for ice cream more than this one...  


Thursday, August 2, 2012

That's just peachy! Part I, Peach Crepes.

Peach fuzz.
Peachy.
You're a peach.
Peachy-keen.
Peaches-and-cream...

Peaches make good conversation.  They make even better desserts - and here is an EASY favorite!  It's peach season and I can't get enough of them; I've been eating them twice a day.  This year, hand-delivered South Carolina peaches won my personal choice award for juicy goodness! 

This recipe is flexible and fun:  Peach Crepes.  Kids like 'em.  Adults like 'em.  What's not to like - sweetened peaches and whipped cream in a feather-light wrapper! 

Start by lightly sugaring a few cut-up peaches in a bowl.  And blueberries.  Or strawberries.  And/or any fruit that will taste good wrapped up with some whipped cream...

Oh - hold on before your imagination gets carried away. We're concentrating on peaches here...

Beat 1 cup of heavy whipping cream (Yes - make it "real"!  You will be so glad you did.) until it starts to thicken; then add 3 Tablespoons powdered sugar and 1/2 teaspoon vanilla extract.  Continue to beat until soft peaks form, and chill until ready to use.  

Next, make crepe batter:  In a bowl that's good for pouring (a quart-size measuring bowl with a spout works well), combine 4 lightly beaten eggs, 1 1/3 cups milk, 2 Tablespoons melted butter, 1 cup all-purpose flour, 2 Tablespoons white sugar, and 1/2 teaspoon salt.  Whisk together until smooth.

Heat a medium-size skillet - or better yet, a crepe pan (a skillet with very gently sloping sides) - which you have greased with a small amount of butter or oil.  Gently swirl a thin layer of batter onto the skillet.   If you have an electric crepe maker, follow directions...I don't know if they make those upside-down mini-skillet things any more.  Leave a note if you have one without instructions and I'll try to walk you through it - or better yet, we'll ask Jodi from peachy SC to send us a video demo!  A griddle, with its big flat non-restrictive surface, is not the best choice - just trust me on that.  We ended up with the shapes of several U.S. states.  This is a VERY thin batter - it's supposed to be, it's the thinnest pancake ever.  And just like a pancake, it will start to bubble just a bit on top; flip it, let it brown gently on both sides (just a minute or two per side), and you are ready to put this dessert on a plate!

Pile on the peaches - or assortment of other fruits of your choice.  Dollop a generous helping of the whipped cream and gently curl the crepe around to make a delicious, fun, and easy treat.  Your family/guests can make their own, just keep the warm and delicious crepes coming to the table.

I can't stop there!  Watch for Part II, more peach sweetness, coming soon....


Thursday, July 19, 2012

Chunky Creamy Zucchini goodness!

Do you have a few zucchini left on the vine...or in the fridge?  

You've tried many tasty recipes but can't resist the temptation to try JUST ONE MORE?  


Try Chunky Creamy Zucchini - it's just the right combination of veggies, herbs and spices, and creamy richness. And like almost everything made with zucchini, it's quick to make.

In a large skillet, heat 2 Tablespoons olive oil.  For color, I added about 1/2 of a finely-chopped red sweet pepper, and let it get a jump-start before putting in 4 cups of chunky cubed zucchini (one large zucchini should be plenty). Add a pinch of red pepper flakes if you have them, and a dash of cayenne pepper.  Be gentle!  'Heat' isn't the idea here, you just want to give it a little attitude.  I have a rosemary plant growing on the deck, and I've been using it in almost everything - so I added 1 Tablespoon of finely chopped fresh rosemary.  Sauté just until the zucchini begins to soften - about 5-7 minutes will be plenty, depending on the size of the chunks.  Salt and pepper to taste.  Add 3 Tablespoons of cream cheese and let it melt to exquisite creaminess, about 2 more minutes.  No fancy sauce here - just pop the cream cheese into the skillet and let it melt.  When it was done, I sprinkled some fresh oregano and a dash of thyme on top, as well - just because they were there.  This was the first time I've had success with growing fresh herbs, which was a near-miracle in this hot midwestern summer.  Of course, T was in charge of watering them - my track record isn't so good in that department!

That's all there is to it!  The herb choices are really up to you.  We found that this was one of those 'even better the next day' dishes, and was acceptable as a cold side dish, as well.  

I can't wait to write about crepes and the deliciously easy peach dessert I made for the kids and grandkids - who all happened to come over when the oven stopped working!  That'll be next time.  I took a little blog vacation because my previous computer was being obstinate...but I've been missing this blog-connection.  
Let me know if you try this - and what are you growing this summer?

Sunday, May 13, 2012

Make your own potato chips - FAST!

I didn't believe this was possible.  Neither did my daughter when I mentioned to her today that I have a recipe for microwaved potato chips that taste great - and turn out crispy.  I think her exact words were: "No way!!" 

I found a recipe for these economical, tasty, easy chips not too long ago and had to try it - I have some fairly serious chipaholic tendencies.  I had on hand a potato, some oil, salt, and a microwave - and that's all it takes.

Start by pouring about 1 Tablespoon of light oil (I used canola) into a gallon-size ziploc bag.  Add 1 very thinly sliced potato and shuffle the slices around a bit until they are lightly coated all around.  You can leave the skins on the potato slices if you like - I did.  Use a mandoline slicer or an old-fashioned potato slicer to get the slices as thin as possible - that's part of the secret to crispiness.  (Watch your knuckles and always use that little potato-holder-thingie to keep your fingers from being sliced!)  I used a regular Idaho baking potato and I think I'll try sweet potatoes next.  Or - how about Yukon Gold!


Coat a dinner plate with oil or cooking spray.  Place the potato slices in a single layer on the plate.


Microwave on max power for 3 to 5 minutes, or until the centers begin to be lightly browned.  If they do not brown, they won't be crispy. Times will vary depending on the power of your microwave, so PLEASE watch them carefully. 
 

Sprinkle with salt and/or other seasonings.  This is the best part - you can use bbq seasonings, herbs, garlic, seasoned salt, ranch dressing mix, sea salt, anything you have on hand!  It's best to be light-handed with the seasonings until you taste a few - it doesn't take much.  My preference is plain ol' salt.  Remove from the plate and let them cool for a couple of minutes on a paper towel - this is when they get crispy. 

Repeat the process until, if you are eating them as quickly as we did, you run out of potatoes.  Re-oiling the plate is not necessary every time, but you may want to if you slice up more than one potato.   

Chip heaven.  Any time you want.  They don't keep especially well, so you'll have to eat them all.  If you have a problem with that, just call me...


Thursday, May 3, 2012

Across the Atlantic

It's been a month since we returned from an incredible 12-day trans-Atlantic cruise. The ship was the Seabourn Odyssey, embarking from Ft. Lauderdale, Florida and sailing eastward to Lisbon, Portugal. The Odyssey made only one stop for an afternoon in Funchal, Madeira.

Pictures really do say more than words. Mere words cannot explain it all, nor express the beauty of the ship, the utter blueness of the sea, the sunsets, the exquisite food, and the staff who were determined to make every passenger's trip the best ever. The nearly 400 passengers/400 staff ratio allowed us to get to know not only some wonderful new friends but also some of the crew on a first-name basis.
Sunsets like this...every night!

Nigerian Shrimp - This is a dinner plate, with one split shrimp!
An incredible warm chocolate souffle.  The waiter cut it open and spooned in the custard at the table.

The main pool and deck area - a gathering place during each sunny day.  And all the days were sunny.
Water everywhere - and we didn't get tired of it.  The days flew!


So grab a cup of tea and visit www.2hungrytravelers.smugmug.com to see many more photos. You will find a whole gallery of food, more ship photos, and some shots around Funchal and from the tram that took us up the hillside for a bird's eye view.

In Funchal

We invite your comments, here, on Smugmug, on Facebook,anywhere - we're pleased to be able to share this journey with you.  Did we like it?  We loved it!  Would we do it again?  In a heartbeat! You might think that after 12 days on a ship we'd be ready to go home. Quite the opposite - we were sorry to have to leave this new little world we'd found; so perfect, so delicious, so friendly!